
You might want to get yourself a cuppa. And maybe a cushy spot to sit. This is going to be a little… lengthy. I’m going to begin with a few pictures of what we started with, the building of the garden beds, and our first garden in the space, so that you have a sense of scale and progress (and because, frankly, it reminds me how far we’ve already come; a reminder I often need when staring at our painfully long project and to-do lists). Bri took all these lovely photos for me.
Let’s Review

This is what the house looked like on the day we first laid eyes on it, April 2009.

This is what the garden site looked like on the day of our home inspection, mid July 2009. As you can see, the previous owner left us a lot of … stuff. We kept, repurposed, or recycled as much as we could, but we also filled up far more landfill space than I’d like to admit.

Just under one year later. We cleaned out the junk, ripped out almost all the plants, leveled the ground as best we could, and ran irrigation. This shot is mid-build. Please note, the front two garden beds are MIA in this picture and as a result those hose stub-ups you see were placed in the wrong spots. Bri had to then trench two more stub-up’s by hand to get us water where we needed it. However, it turned out to be a fortuitous mistake as we left the accidental hose bibs in place and they have come in very handy for hand watering.

The beds were not completed and filled until mid-August 2010. Undeterred by how ridiculously late in the season it was, I put in some tomato starts and even sowed zucchini, corn, watermelon, cantaloupe, tomatillos, and beans from seed (let’s not discuss the “harvest,” m'kay?). Three months later this is what it looked like, in November 2010. This makes me laugh in comparison to this year’s garden, especially when I see the growth gains in pictures taken a single month apart.

This is the garden on June 20th of this year. I started planting at very end of May which, while a vast improvement over last year, is still at least a month but probably more like two to three months later than we should have started. At the very least we could have had a round of cooler spring crops in and out before these went in.

This picture is also from June 20. These tomatoes (the tiny plants you can barely see hiding behind the trellising panels) are all ones I started from seed in April. This is the first time I have started a majority of our plants, including the “difficult ones” from seed instead of purchasing starts and I had so much anxiety over when to start and when to repot and when to transplant. I felt like I was sticking infants in my garden to fend for themselves when I set these out. Surely, Garden CPS should have been notified.
Get On With It, Already!

And now we begin The Tour of the yard and garden as it is now. We’ll go through it as an overview, and then each bed individually, and then other areas of interest. I assume you’re still reading because you’re interested. Or you’re a glutton for punishment. Either way, we begin.

The view of our main patio from the garage roof. There are small trees in pots, along with mints and petunias. Petunia is such a stuffy name for such a fun, flouncy flower, is it not? Those lines you see are our retractable clothes lines, waiting for the next load. The above-ground spa came with the house. It’s definitely not the most “green” thing, especially if we actually heat it (rare) and taking into account all the chemicals necessary to maintain it, but it is admittedly oh-so-nice after a long, hot day on the homestead.

Mid-yard. We ripped out the old, yucked up sod and reseeded about two months ago. We put in a mix of fescue and clover. It should be reasonably drought tolerant, as grass goes, once established. The clover will be food for the bees and we can pick it for tea. When we mow the greens will go to the birds and to the compost to add much needed nitrogen. That lovely pineapple fountain came with the house. (FREE to a good home! Or any home. Besides ours.) Where it sits is the home of our future wood-fired brick oven. Against the wall we put part of the citrus trees and the strawberries.

North-west corner of our yard. The enclosure in the far corner was built by the previous owners as a dog run, but is slowly being commandeered by poultry. It’s not my ideal poultry run, because it is all on a cement pad, but you have to work with what you’ve got. The desert oak, while getting too big for its britches is great for providing protective shade for the birds during the hottest part of the day. And you can also see that we back up to the far corner of a school yard. Fewer neighbors to worry about and a regular influx of various size balls for Guinness to disassemble, win-win.

Front half of the main garden, from the garage roof.

Back half of the garden, from the garage roof.

Front third of garden from the back fence.

Mid-garden from back fence.

Back half of garden from back fence.
Garden Beds, One by One


Edamame (I planted a whole packet and had about 5 plants come up), stevia, fenugreek (grown from seeds out of my spice cabinet), fennel, cucumbers, and garlic (that sprouted in the compost bin, so I threw it in the bed to see what would happen).
The summer squash bed. Black beauty zucchini, Cocozelle, white patty pan, and baby round zucchini. Two of each. WhatthehellwasIthinking.

Snap beans, including Contender, Dragon’s Tongue, Purple Pod Pole, Royalty Purple, and Kentucky Wonder Pole and the volunteer squash (more on that later).

Tomatoes that I started from seed. Black Krim, Cherokee Purple, Amish Paste, Nyagous, Moonglow, Green Zebra, Cherry Current, and Brandywine. Look how big they are getting! And they are just starting to flower.

Winter squash bed. From left to right, Trombonico, spaghetti, Delicata Honeyboat, and butternut. In between I’ve seeded heat-sensitive crops – cilantro, flat-leaf parsley, chives, and lettuce.


Recently seeded basil bed. There’s also a random Bright Light’s Swiss Chard plant (yellow) and a sad looking volunteer borage. We love pesto, so basil is a crop, not just an herb.

We’re trying cantaloupe again, at a more seasonally appropriate time of year, and interplanted it with sunflowers. We’re trellising it, although it seems disinclined to stick to climbing; it also wishes to go visit its neighboring beds.

Sweet potatoes. This is my first time growing them. I purchased three slips from the plant guy at our farmer’s market that he said are purple sweet potatoes. The rest I grew from organic store-bought sweet potatoes that I grew slips from and then transplanted. They seem to be doing well. Fun fact that I recently learned: sweet potato greens are edible!

Watermelon interplanted with sunflowers, including some mammoth sunflowers whose stalks are as thick as my forearm!

The honeydew bed with sunflowers, and leeks which I failed to pull and have gone to flower and which the honeydew are now climbing.
We have one more (empty) bed slated for peppers, eggplants, and tomatillos. My seed-starting efforts on that front went less than swimmingly this year, so I’ll be using some gift cards to get some starts that will go in this weekend.
Animals, Compost, and Pots

The poultry run. This is where our two adult hens and one almost-adult pullet reside. The next big project is a major expansion of the poultry run and a new coop to house all the birds.

Two month old chickens in our portable run. Ten girls, two each: Barred Rock, Rhode Island Red, Buff Orpington, Araucana/Americanas, and Black Australorps. Once the new run is built and they are close to starting to lay they’ll move in with the big girls.

The ducklings, all five Khaki Campbells. They will live with Lucky once the new run is built and they are a little bigger.

Compost bins on the other side of the animal run. These are where the kitchen scraps go, since they are animal-proof. Other stuff goes in too, as needed.

Compost Pile. Mostly for garden “waste” and spent poultry bedding.

Next to the side door I have a potted kitchen herb garden. Regular and lemon thyme, lemon balm, sage, oregano, rosemary, lemongrass, tarragon, chives, and garlic chives. I need a couple more.

On the opposite side of the steps to the side door is a big pot of basil. I let this go to seed a couple times a year and it reseeds itself. That aloe plant is just waiting for a new home. And you can see the end of one of the seed-starting racks Bri built me.
Some Side Notes and Tips
Tip #1: Hedge your bets (if it’s not too cost-prohibitive).

It was my first time starting tomatoes and peppers from seed. I took a pragmatic approach and spent $10 on 5 tomatoes and 5 peppers that I put in pots, just in case mine were a flop (purchased when our local nursery had one of their 50% off sales). Plus, I knew they would give us tomatoes at least a month before the ones I started. I also potted up a volunteer tomato that sprouted in the compost bin and it is giving us fruit too!
Tip #2: Remember to be grateful for volunteers, even if they don’t work exactly how you might prefer.

This applies to tomatoes that sprout next to your animal run, as well as people. This tomato came up a couple months ago and I let it grow; it appears to be a cherry type.

Up close and personal with a female squash flower. I just included this because I think it’s such a cool shot.
Tip #3: If you use rigid fencing as your trellis material for your winter squash, keep an eye on it and gently push them out when they start to rest in a square.

Otherwise it’ll wedge itself in there and then proceed to grow around the squares. Just sayin’.
Tip #4: If you let volunteers grow, you take your chances.

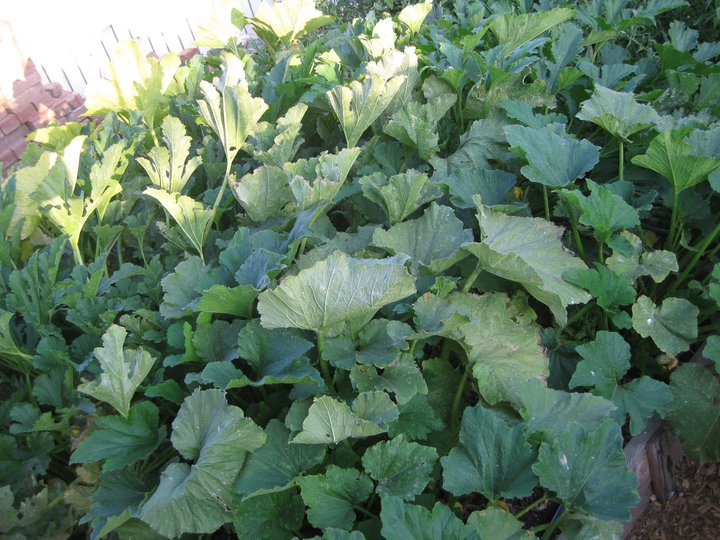
Shortly after we amended all the beds a squash plant sprouted. I decided to let it be and see what it would give us. This is approximately a month after it sprouted.

A mere 15 days later.

And one month after that. We’ve started referring to it as the monster squash. I have no idea what variety it is (if you know, by all means, please advise). I suspect that it is a cross between a winter and a summer squash, based on the growth habit it is displaying and my very limited knowledge.

It has been so very prolific and we have enjoyed the flavor and texture, treating it like a summer squash.

We decided to let this one develop fully, so we can save the seeds (hoping to avoid cross-pollination we picked this one to save because it set before our other squash started flowering). It’s a gamble, but I hope it works. This is ridiculously heavy for its size. We are going to let a few others ripen fully and see what kind of eating they are that way.

In solidarity with front yard food (and because we needed to hide some more dirt) Bri built me two beds in the front yard. They still look like this, but they are destined to be home to some larger perennial and biannual crops (rhubarb, aloe, perhaps asparagus, artichoke). We refer to the area behind the fence as the front yardette and it houses roses, blueberries, and hibiscus.

We also have an orchard. Check out the details on that here. Look, you can see our new front door that I painted eggplant PURPLE! I lovelovelove it!
I hope you enjoyed this peek into our garden. Thanks for visiting, come back again soon!
This post is part of the Nosy Neighbor Virtual Homestead and Garden Tour hosted by Erica at Northwest Edible Life.