Thursday, December 24, 2009

Merry Christmas

I apologize for the lack of posting, it has been a rough month for me. Plus I've been fighting with Blogger about including and formatting pictures in my posts. I'm sure it is mostly my ineptness with this new-fangled technology :o)  but it is frustrating nonetheless.


I wish you all very happy, healthy, and safe holidays, we'll catch up soon.

Wednesday, November 25, 2009

Giving Thanks

So what are you making on this day of thangsgiving? I am making what I made last year. My mouth is watering already for the green beans...


Drooling concluded, moving on. If you should find yourself with leftover squash, may I suggest this? I was craving a creamy squash soup, but not the curry that typically flavors such things. This hit the spot. It's also a great way to use up extra squash (the butternut that I had from the farmer's market was huge). The only note is that if your squash is already cooked it should not be too heavily sweetened or seasoned. The seasonings in this are very much dependent on the squash you use and your own taste, so the quantities should be viewed more like guidelines.


Autumnal Squash Soup
Serves 2-4, depending on how thick you make it and if you are serving it with anything else.


2.5 cups steamed and mashed squash (mine was homemade and therefore a looser consistency; you can use canned, just add about 1 cup of water to a 15 oz can of packed squash)
2-4 tbsp cream, half and half, nut cream,or milk of choice
1-3 tbsp dark agave
~ 1/2 tsp rubbed sage (use less if using ground)
~ 1/4 tsp ground nutmeg
~ 1/3 tsp ground ginger
fresh ground black pepper
salt, to taste
1 can or 1 1/2 cups mild white beans, rinsed and drained (optional)
water, broth, or additional milk/cream sufficient to achieve desired consistency


Place everything in your blender or food processor and blend until smooth. Heat over medium-low until bubbling gently. Cook, stirring frequently, 2 minutes and then taste and adjust seasoning and thickness as needed.


Serve hot.


Local Deliciousness

Along with my soup (which was made with local butternut squash) I had this yummy (mostly) local salad: lettuce (CSA), pear (CSA), toasted pecans (gifted by a friend who's father-in-law brought them from TX where he had shelled them himself!), goat cheese, and honey mustard vinaigrette (with local honey).


I am winding up the last 2 weeks of my first quarter of my Ph.D. program. That combined with the work on our house has made for a busy and challenging last couple of months, hence the lack of activity here. But I do have a few things I'm working on and I look forward to more doing more regular posting. I'll have some house updates as well as a few recipes. 


Also, a small note - I'm sorry I had to add word verification to commenting but I was getting a lot of spam comments. I'm hoping this will take care of that and I can remove it shortly.


In other news I have taken Crunchy Chicken's challenge:
Buy Hand for the Holidays Challenge - 2009


I know it's getting later in the season, but I hope you will consider making at least some of your holiday handmade, or planning ahead to do so next year. We've been doing more and more of this the last couple years and we find that everyone seems to really enjoy the gifts. And we enjoy giving them because we feel like they actually come from us and are within our means (which makes the whole season so much less stressful!). It's a win-win all around.  


I hope you have a very joyful Thanksgiving.

Sunday, September 6, 2009

A Reccomendation, a Discussion, and a Change

First thing first. If you have not yet seen Food, Inc. go. If you balk at paying $15 for a movie (and really, who doesn't?) plan on hosting a viewing party the minute it comes out on video. Those of you who are dyed-in-the-faux-wool vegans may argue that the film does not encourage people to go outright vegan and is therefore not helpful. However, the film talks about more than just animal agriculture, it is a larger discussion on our whole food system.

After much thought and research and discussion have reached something like homeostasis in my views on diet as it relates to my health, the environment, and ethics. I may lose some readers for saying this, but it is more important to me that I be sincere and forthright than to appease others. I am not opposed to responsible, sustainable animal agriculture. I am well aware of the arguments that there is no such thing. I disagree; people and animals have co-habitated and co-depended on one another for thousands of years. Our eco-systems are dependent on both fauna and flora inputs to be healthy. I am not under any illusions that will cease to be the case. I am adamantly opposed to industrial animal agriculture and I know that as a nation we eat entirely too many animal products. I believe that a plant-based diet, meaning consisting primarily of plants, is most definitely the healthiest, and most sustainable, way to eat. However, I don't think that advocating a vegan diet as the only option is the most efficacious way to encourage people to improve their health and that of the planet.

I aim to never stop learning, I am always reading, researching, browsing. At this point I find myself most in line with Michael Pollan's position of "Eat food. Not too much. Mostly plants." And more importantly with the position that we should endeavor not to eat that which our great-great grandmothers would not recognize as food (I'm perfectly willing to pretend that my great-great grandmother was quite the world traveler and ate foods from all cultures). That means that processed foods are out, including vegan processed foods. I think whole soy products in moderation are a perfectly healthful part of a varied diet. However the pervasiveness of soy derivatives (and corn derivatives for that matter) in our food supply concerns me. If your primary or sole motivation for being vegan is animal rights then I understand that veganism is essentially your only philosophical option. However, from the standpoint of health and environmental concerns I don't see a great deal of difference between eating fractionated "food like substances" (especially from GMO crops), vegan or otherwise, and eating conventionally raised animal products. They are both hard on our bodies, the environment, and the people involved in producing them.

This small but significant shift in my perspective has led me to reconsider my blog title. Firstly, I don't want to misrepresent the vegan community. Much of what I do eat is and will continue to be vegan, however I do incorporate some dairy and eggs into my diet. That combined with the broader focus I have take to include my path to simple, greener living has led to the choice to change my blog title (the actual web address will remain the same). I hope you find it informative and encouraging.

Tuesday, August 11, 2009

Goings On

A photo journal of my little neck of suburbia over the last few weeks.

Nearly open sunflower in my mom's garden.

My first time growing okra. I was blown away by how lovely the flowers are. This is a Red Burgundy Okra from Seed Savers Exchange.

A summer supper: CSA coleslaw (cabbage, turnips, carrots) and homemade chili covered baked potato (with homegrown tomatoes).

Biscotti for a crowd. Recipe needs a some work, but is very delicious, it just wasn't dry enough.

The original baseboards at our new house. You can see the paint build up on the bottom. The original paint was oil based and there are at least two layers on top of that. Unfortunately, they were not properly primed before being painted over with a latex paint and as a result are peeling in some areas. Which means we have to replace them if we want our paint job to be durable.

There's a toe-kick piece at the bottom that we had to remove first. You can clearly see the paint layers here. As you can also see, they put in the baseboards and then painted. That order is backwards and is resulting in more work for us.

Here is the wall with the baseboards completely removed. The other issue we have found are that they did not smooth the plaster below the old baseboards. The new ones we are putting on are about 1/4 inch shorter, so we are having to improvise. Also, since they painted the baseboards in place and didn't tape off very well, there is a paint line on the floor around the perimeter of the whole room that I have the privilege of scraping off with a putty knife and some solvent. Fun.

When we closed a couple weeks ago I was so excited to discovered a volunteer watermelon plant! At the time I didn't see any fruit on it. Well this past weekend I discovered a couple. No idea how we missed them. Here's the little one.

And here's the big one! I've never grown watermelon before and I've no idea what kind this is, so I'm not sure when to harvest it, but since we've yet to have a really good watermelon this season I'm salivating already! The vine is really healthy and spread out, with lots of flowers, so I'm hoping we get a few more fruit off of it.

Monday, July 27, 2009

It's Ours...

We are officially homeowners!

Monday, July 13, 2009

Weird...

I made us a smoothie this morning, as usual, and when I tasted it my mouth said "chocolate!" and my brain said "huh?". B said the same thing when I asked him later; he had thought I'd made the a chocolaty smoothie I sometimes make for a treat. But I hadn't put a lick of chocolate in the thing! Weird. It does turn out light brown in color, so maybe you can fake out your kids :o)

The Unchocolate Fruity Smoothie


1 large banana, peeled
1 orange, peeled
1/2 lb baby spinach
12 oz frozen, pitted sweet cherries
1 tbsp almond butter
3-4 tbsp vanilla hemp protein powder (I used Trader Joe's)
1 tbsp bee pollen
8-16 oz water

Place banana, orange, and half of spinach into blender with 1/2 the water. Blend until spinach is just pulled down. Add remaining spinach and pulse again just until pulled down. Add remaining ingredients and run blender until smooth (I used the "whole juice" button on my Blendtec). Add remaining water to achieve your desired consistency, or if your blender needs some help.

Serves 2 as a meal or 4 as a snack.

Sunday, July 5, 2009

Fiery Roasted Salsa

In an effort to use up some of the tomatoes we harvested I canned up a batch of salsa this weekend. I combined two recipes to come up with this and doubled the batch. (If you are new to canning please stick to a tested recipe, especially if you are using low acid foods as proper acidity is critical to the safety of your final product if you are using a water bath canner.) I made sure I used plenty of vinegar to ensure adequate acidity but be warned, this is not a by-the-book tested recipe. If you want to make this but are uncomfortable with canning, or just don't want to, you can definitely freeze this, in which case you would also have more room to play with ingredients since acidity is not so much an issue with freezing.

I used peppers in three different ways and roasted the veggies to add depth of flavor. I like this kind of salsa on the smoother side, so I pulsed almost all the veggies in the blender. As a bonus this means I just left the peel of the tomatoes on, saving me a step and keeping the extra roasted flavor in. I did this whole thing on the grill to avoid heating up the house and to enjoy the lovely day. You can also use your oven's broiler, you just may have to split the veggies into a couple batches.

Unless you are the type to eat habaneros straight this salsa will knock you on your butt. I'm thinking it will be yummy mixed into some sour cream to help cool the fire.

Start you boiling water canner to heat. I heat my clean canning jars along with the water so they are hot when I'm ready to go. You'll also need a stock pot that holds at least six quarts. For more in-depth canning instructions go here or check your local library for a variety of books.


Roasted Salsa
Makes 8 pint jars or 16 half pint jars.

Slice 7 lbs of tomatoes along their equator (this makes seeding them much easier). Seed them and set aside. If you are using a meatier tomato like an Amish Paste reduce the amount to 6 lbs. The recipes I was basing this on instructed you to roast the tomatoes and then peel, seed and dice. However, seeding and dicing tomatoes that are roasted is rather difficult since they get really soft. Seeding before hand is much easier and you don't have to wait for them to cool.

Toast up 24 dried peppers about 30 seconds on each side then transfer to a glass or metal bowl, cover with 2 cups hot water, weigh down with a bowl or plate and set aside to soak. I used 12 guajillo peppers, 6 chipotles (dried, not canned), 3 Californias, and 3 chili negros. You can safely substitute an equal amount of different dried chilis, or reduce the number, but don't add more if you are canning the salsa.

Everything that I grilled: 2 heads garlic broken into cloves (in aluminium tray), 4 small onions, peeled of loose skin, 4 jalapenos, 4 poblanos, and the tomatoes. I put the tomatoes cut side down for just about 30 seconds to get a touch of color then flipped them skin side down to finish roasting. You want them to develop plenty of charred color and flavor but pull them off before they turn completely to mush. Turn the peppers and onions occasionally, until blackened pretty well on all sides. Give the garlic a toss/shake a couple times; I let them go until I was done with the rest of the veggies. When you pull off the chilis transfer them to a paper bag, roll down the top to seal and set aside. Transfer the tomatoes to a bowl as they will give off a lot of liquid that you want to keep.

Stem your dried chilis and transfer them and their soaking liquid to a blender or food processor. Pulse until you achieve a rough paste. Transfer to stockpot. For all the veggies I ran through the blender I was going a for smooth, but not completely pureed consistency.

Skin the onions and garlic and transfer to the blender. You'll want to keep a small bowl of water handy to rinse your fingers while you are peeling the garlic as it is very sticky and you'll need to rinse your fingers a couple times during peeling.

A shot of the onions and garlic. You can see that the onions get a bit translucent on the grill, but they don't get mushy. The garlic however get nice and soft. I used a bit of the tomato juices to help these along in the blender.

You can see that the tomatoes get very soft. Blend as with the other veggies and transfer to the stockpot. If you opt not to blend your veggies you will need to peel the tomatoes or the skins will create an unpleasant texture in the final product.

Your peppers will get very dark and partially collapse from roasting. Putting them in the paper bag uses their own heat to steam them and make them easier to peel.
(And didn't B take some lovely pictures? Thanks babe!)


Pepper skins are pretty tough so I did peel them. A word to the wise: wear gloves when handling all these peppers. I didn't (and I know better!) and I had a serious chemical burn on my hands that night since I also didn't wash off the capsicum oil quickly enough.

The blended roasted chilies on top of the tomatoes. Can you see the wolf?

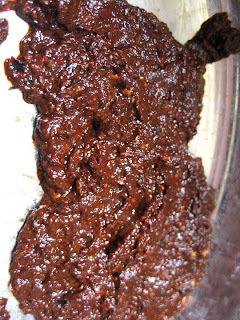
A close up so you can see the texture.

I also used 2 fresh jalapenos and 1 fresh poblano pepper. These I seeded and chopped fine.

Mix together all you roasted and fresh veggies, 1 bunch stemmed and finely chopped cilantro, 2 teaspoons salt, and 2 cups white vinegar. (Yes 2 cups - it is essential to ensure adequate acidity for all these low-acid fruits and vegetables). I recommend sticking with plain (cheap!) white vinegar for this as the nuances of a more expensive vinegar will get lost in all these big flavors. Simmer over medium heat 15-20 minutes.

Fill hot jars with hot salsa to 1/2 inch of top. Wipe jar threads clean, top with a hot, previously simmered lid and ring screwed on finger tight. Place into water bath, bring to a boil, and process 20 minutes. Turn off heat, leave for 5 minutes then remove jars to a towel covered counter. Leave undisturbed for 24 hours. Check seal (when you press on the center of the lid it should not pop up and down), remove rings, wipe jars clean, and store in a cool, dark, dry area. It is recommended that home canned goods be consumed within a year for best flavor, however if they are correctly processed, properly sealed, and show no signs of spoilage they will technically last quite a lot longer.

I still have something like 20 pounds of tomatoes so if anyone has suggestions for what to do with them I'd love some ideas!

Wednesday, July 1, 2009

Take 20 Minutes...

...and watch this, if you haven't already; it's important. http://www.storyofstuff.com/index.html I will have more to say about it later, right now I'm too tired to articulate my thoughts, and I need some time to mull it over.

Craziness

I just wanted to let everyone know that I haven't abandoned this blog! This has been a crazy couple of weeks. B and I were back from Hawaii 5 whole days before we left for Chicago for a week, then we had to move out of our house by yesterday, which means we moved into PODs since we don't actually have a house to move in to (my parents are very generous to put up with us for a month so we won't be homeless!). On top of all the copious paperwork already involved in purchasing a house, we learned that in order to qualify for our loan we have to have the water heater raised off the floor and we have to have the entire exterior of the house painted prior to closing. That's right, today I hired a painter to paint a house we do not yet own. *Super* So needless to say, we've been just a little bit busy. I promise I'll post something next week. If nothing else I'll try to keep you updated on the house status, since I know it is keeping you on the edge of your seat :o)

I'll hopefully have a chance to catch up on reading all your blogs in the next week or two, I feel so out of the loop!

Have a happy day!

Monday, June 15, 2009

Offically Offical

We are officially in escrow. This is our new home! We've had the inspection, aside from some TLC that is to be expected on any 75 year old home, it is in pretty good shape, nothing needs to be done immediately except paint the interior. As long as the appraisal goes well and the paperwork goes smoothly we should close escrow late July.

It was built in 1936. The wood floors are original and it has copious built-ins. The windows are also original, and as lovely as we find the wavy glass we do plan to replace them as they are highly energy inefficient. It also desperately needs to be better insulated, so those two projects are first on our list of more expensive to-do's as they will also save us the most in the long run. Eventually we will need to refinish the siding, but that is not pressing.

This is the site of the future main garden. The previous owners left quite a bit of stuff both inside and out which we need to sort through. Some we will keep and repurpose, such as the lovely pile of bricks. I will eventually rip out pretty much every plant in here as well as the boarders around the rest of the yard. Except for a few frivolous flowers that I love my goal is to make all our landscaping edible and/or medicinal. The front yard will be turned into our orchard. I have big plans, can you tell?! :o)

So, in sight of all this moving we've mostly ripped out the garden, including at least 25 lbs of tomatoes. There's at least another 15 pounds green, still on the plant that we managed to leave in for now. We are hoping some ripen and the rest I will likely can up into green tomato chutney or something. In the mean time I am drying some of the ripe ones. I also took out the Swiss chard - I'm guessing 25 pounds. I need to get that blanched and frozen before we leave for Chicago on Wednesday, among the myriad of packing we are trying to get done. Phew, I'm exhausted just thinking of it all!

In other news, I think I've forgotten to mention that I was accepted to and offered a fellowship for a Ph.D. program in Political Science. I'll be starting that at the end of September. It's a quarter system, which I've never before been on and I will also not be working full time for the first time in more than 5 years. I finished undergrad and completed my master's while working full time and going to school full time so this is going to be an adjustment, both financially and mentally. Any tips you may have for surviving grad school are welcome! You can email me if you don't want to leave it in the comments.

Because, you know, I'm incapable of dealing with only one "life stressor" at a time. Nope, I like to bundle them together :o)

Tuesday, June 9, 2009

Otherwise Occupied

Oahu
West Shore - Ko Olina
Extremely busy relaxing. Be back next week.

Monday, June 1, 2009

Sandwich Simplicity

I am a mayonnaise hater. There I said it. I will never understand the dipping of anything in to straight mayonnaise. However, I do tolerate it as a binder in a few things, namely various savory salads. Growing up chicken salad was one of my favorite sandwiches, but obviously I've not had it in some time. I recently ran across a vegan version using soy curls and thought "duh, why didn't I think of that?!" and immediately set out to create my own. It's similarity to the original is uncanny. I use just enough mayonnaise to bind the filling, but you can of course adjust to suit your taste.


Chicken Salad Sandwich

1/2 cup water
1/2 tbsp chicken broth concentrate 
1/2 cup dry soy curls
1 stalk celery, diced small
1 tbsp chives, minced
1 1/2 tbsp mayonnaise
salt and pepper to taste
bread and toppings of choice

Place water and broth concentrate in a microwave safe cup. Heat on high about 1 minute or until hot and broth is dissolved. Give it a good stir and add soy curls. Stir to ensure all the curls have had made contact with the broth and let stand five minutes. 

Drain curls and squeeze out (you don't want the totally dry, but they shouldn't give up liquid easily), and chop well. Add to a bowl with celery, chives, mayonnaise, salt and pepper and stir until evenly incorporated. Pile onto eating vessel of choice and dig in. I like mine on whole wheat bread with fresh sprouts. Yum!

Thursday, May 28, 2009

An Adventure in Homemade Pasta

In my quest to use the Swiss chard that has been so prolific in my garden I made homemade green pasta a couple weeks ago, inspired by Kate's post earlier this month.

This was my very first time making pasta. A few years back I tried some fresh pasta from the grocery store and was so underwhelmed that for quite a while I didn't really see the merit in taking the time to make my own. I have now seen the error of my ways - this was delicious!

While they are nice you don't need a pasta roller to make pasta, just know hand rolled noodles will be a little thicker than those a roller would produce. I did this entirely by hand. You can definitely do the kneading in a heavy-duty stand mixer but I find kneading therapeutic and I like to do brand new (to me) doughs by hand the first time so I get a feel for them. I did use eggs in this recipe, although I am going to try a vegan version next time with flax seed. I'd like to try drying it, but I do think I'd rather do that with a vegan variation. Also, it will probably dry more readily with thinner noodles and after this experiment I can say that I would definitely use a pasta roller... 

Homemade Green Pasta
Serves 8-12. If you don't have fresh greens you can make this from frozen, thawed greens, just use the 7 3/4 oz squeezed dry amount as your guide. 

1lb 4oz stemmed Swiss chard or other dark leafy green (weighed after removing stems), chopped
4 eggs
2 cups all purpose flour
2 cups whole wheat flour
2 tbsp vital wheat gluten
1 tsp salt
2-5 tablespoons water, as needed

Bring a medium pot of water to a boil and salt generously. Blanch the chard 30 seconds - 1 minute, until bright green and just tender. Drain immediately and allow to cool then squeeze out as much liquid as possible (you should have about 7 3/4 oz once blanched and squeezed dry). I like to use a clean cotton kitchen towel for squeezing greens dry.

Finely chop 3 ounces of chard and set aside. Place the remaining chard and all four eggs in blender and blend until smooth. 

Mix all the dry ingredients together and pour onto counter (you can mix it in the bowl too, but doing it on the counter is fun!). Make a well in center of flour and pour in the egg mixture. Work flour in to eggs using a fork until you get a loose dough. Add the chopped chard and, using your hands, continue working flour into dough. Add additional water a tablespoon at a time as need to incorporate all the flour. You should have a tacky but not sticky dough. Knead dough 10 minutes or until smooth and elastic (it will not be perfectly smooth due to the chopped chard). 

Shape it into a ball, cover with a damp cloth, and let rest 30 minutes. 

After resting your dough divide it into four sections. Liberally flour your work surface. Working with one section at a time, roll it out as thin as possible into as even a rectangle as you can manage (you don't want too many weird edges). Cut into whatever shape you like. I used my pastry cutter on the first two sections, however it is just not sharp enough to handle pasta dough, so I abandoned it for a knife on the last two sections. I would like to note that as cutting surfaces go, granite is "EVIL" as far as you knifes are concerned, to quote Alton Brown.

It did make for pretty noodles though. I ended up cutting it into about one inch lengths just prior to cooking.

Once you have all your noodles cut sprinkle liberally with flour to prevent sticking and set aside to rest and dry a touch while you bring a large pot of salted water to a boil.

Add noodles to rapidly boiling water and cook 2-3 minutes, or just until al dente; fresh pasta cooks much more quickly than does dry. It will float, like ravioli. Drain pasta and immediately toss with sauce of choice. Serve hot.

A totally homegrown, homemade meal. 

Homegrown Swiss chard in homemade pasta, homemade pesto frozen from last summer's homegrown basil, homegrown tomatoes, and served with homemade Italian seitan sausages. If you have seitan sausages, pesto, and fresh pasta in your freezer you can have this entire dinner on the table in about 15 minutes. Healthy, fast, and entirely homemade. You can't beat that.

Tuesday, May 26, 2009

Cooking with Hippies

Friends of ours invited me a while back to come visit them and help cook for a weekend for a training they were hosting. That weekend was a couple weeks ago so I thought I'd share some pictures. 

B and MJ went to high school together, which is how we know them. MJ and EA work for the Student Conservation Association as year-round staff. They actually met through the program and now plan and host trainings for crew leaders. As part of their job they get to live full time in the beautiful Delaware National Water Gap in a previously defunct YMCA camp. This lake is right outside their front door. Yes, I am seriously envious. 

The second morning I was there I woke up to this. It had rained the night before and was all misty and beautiful. I love visiting the East Coast. I get to bath in the lush greenness of it all. The few weeks of green hillsides a year that we get in SoCal pales in comparison; I hunger for it. 

EA and I, along with a couple others, spent Thursday - Sunday feeding a group of 60. It was so much fun (you know - if you think 16 hours/day in a kitchen is fun. Which I do. Yes I realize I'm Aby-Normal). The group consisted of omnis, vegetarians, and vegans, so except for the night we had an entirely vegan Indian feast we made at least two and usually three versions of each meal. I got to cook on this professional stove - heaven.

Peach Cobbler

We made breakfast, dinner, and dessert every day. For lunch we put out leftovers, sandwich fixings, and snacks and everyone was responsible for fixing their own lunch. EA was able to get dairy and eggs from local, family run farms. She also ordered her dry goods in bulk from the local health food store (the nearest town is pretty small, so the owner of this store actually works there - novel!), supporting a locally owned business. Everyone appreciated that she had taken the time to find local sources, to the extent that her budget allowed.

One morning we made Blueberry Strudel Muffins. We ended up with a bit too much batter, so I poured it in a pan and called it coffee cake. It was my first time using this recipe and I think with some experimentation it could be both delicious and reasonably healthy. Even with all the desserts and breakfast goodies it was by far the healthiest and tastiest "camp food" I've ever had.

They are serious about reusing, recycling, or repurposing everything possible. There was a bucket in the kitchen for all the food scraps, which went into the compost pile. The egg shells and coffee grounds went directly into the garden to feed and protect the plants. Empty plastic bags and containers were washed and saved for storage and lunch bags. There were no throw-away plates, utensils, or cups. Tread lightly was the name of the game.

The Part in which I Review Vita-Mix

While I was there I got to use a Vita-Mix for the first time. (As you can see I got to make a green smoothie! Despite how healthful the food was, I was still way below usual for fruit and veggie consumption, so this was really great. It was my lunch Friday and Saturday.) B and I had spent a lot of time researching before we picked the Blendtec and after using the Vita-Mix I am really happy with our choice. Don't get me wrong, if you have a "regular" blender either a Blendtec or a Vita-Mix will seriously improve your results. However, this green smoothie had flecks of green still present, even after a couple minutes of processing. I also used it to make hummus one day and despite the fact that it was a pretty thin hummus the machine still struggled. I had to keep turning it off and on to keep it from smoking. Additionally, the hummus was similar to the consistency I achieve in my food processor, as opposed to the totally smooth "paste" (as B calls it) that I get out of the Blendtec. I thought the tamper would be helpful, but it was more cumbersome than I was expecting, feeling more like an impediment than a help. Furthermore, I felt like I had to use it to get the blender to work well at all, even on reasonably thin mixtures, as opposed to a tool to help the blender along occasionally. A few more observations: it is next to impossible to get the remains out of the bottom of the jar, unless you have a very small spoon perhaps. The unit when all together is very high, there is no way it would fit under my counters and given how much we use ours it doesn't get put away much so that would be an issue. Finally, I like that Blendtec only requires one jar to handle both wet and dry jobs; it is one less thing to purchase and store. In summary, I continue to recommend Blendtec.

I also got to visit with this sweet girl. It is so nice that MJ and EA have jobs that allow them to keep her with them. 

Make a wish.

I had such a great time. On Saturday night we had a Contra dance with a live band. It is super fun, a folk dance similar to square dancing (there is a caller) but done in lines. It is *so much fun* and great exercise to boot. There was also a thunderstorm that night with lightning and everything. What a treat for this parched California girl!

Monday, May 25, 2009

News and the Weekly Menu

We are officially moving. We are still waiting for a decision about the house we made an offer on (it is a short sale - a misnomer if ever there was one!) but we just found out that we need to be out of our current house at the end of June. Since this likely means we will be staying with my parents for a short time I am starting to panic about the food in my freezer. So my strategy is to try and use something out of the freezer at least once a day while not adding anything new (I may make an exception if we totally run out of fruit for our smoothies). On top of everything else we are going to Hawaii for a week and to Chicago for a long weekend in June, both of which we are looking forward to, but it is making for a jam-packed month!

Click on image to enlarge.

Wednesday, May 20, 2009

Weekly Menu

Finally, a week "normal" enough to do a menu. I miss it when I don't have one, it really does make the week so much easier!

Click on image to enlarge.